
Showing posts sorted by date for query artisan. Sort by relevance Show all posts

18.8.11

we're 1 + a gift for you!


Today marks one year for Me and Jilly.  Certainly cause for celebration!

The idea was born as I lay on bed rest last August after intense knee surgery.  Just a way to force documentation of all things good and bad in my design world.  The more I thought about it, the more I realized that nothing I do is complete without my best girl Jilly.  I called her up and told her we were starting a blog together, and that was it.

I won't say that every moment has been the most! fun! ever!   But I will say that I've learned a LOT about computers, following directions, and patience.  Each time I stayed up until 2am mastering things like how to download actions in Photoshop, or how to make a button code (and it actually worked), I took a victory lap around the family room.

I have loved spending time with Jilly, looking back at past projects, sharpening my photography skills, and documenting many moments that I wouldn't have otherwise. 

Jilly and I will be celebrating our anniversary next month in New York (oh, now it sounds like we're married).  Of course we'll document the whole thing and maybe even bring you a shot glass from the Statue of Liberty.  But in honor of today, please enjoy a party favor from the pair of us. 

For our followers and subscribers, we've turned a few of our favorite quotes into 8 x 10 printable works of art, and we'll be giving them away for one month (through Sept 18th).


You like?  All you have to do is leave a comment with your email address, and we'll send all four prints your way.  If you're not currently a follower or subscriber, simply sign up on our right sidebar and leave a delightful comment.  We'll rush the prints to you as fast as our little fingers can push send.

*Hint- we like these printed best on {bazzill} white card stock, but any heavy paper will do.  Frame it, mod podge it, give it away, keep it, the sky's the limit.


After you've posted a comment, you may want to stop over and check out the projects we've recently added to our {tutorials} page.

Or check out some of our favorite posts thus far....

Our Very First Post {here}

Anthro Bureau Knock Off {here}

All The Single Ladies {here}

Coffee Sack Headboard {here}

The Most Easy and Delish Artisan Bread {here}

We love you!  

j + m 
 

25.10.10

knock you socks off artisan bread


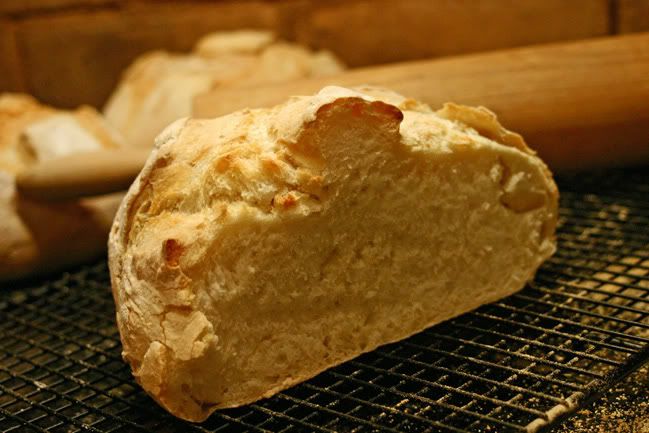
Mommy and I felt like we had stepped into a charming, French chateau the afternoon we were invited into my neighbor, Severine's, kitchen. We brought tomato bisque, made with fresh cream and garden herbs, with the promise of her rustic artisan bread to accompany it. It was like a dream come true for two simple girls from a small town in northern Arizona. We were going to learn how to make true artisan bread just the way Severine remembered it from her grandparents own bakery in France.

Severine began by showing us the ingredients, which were surprisingly simple.....flour, salt, yeast and water. She quickly came to the aid of our surprised faces (these ingredients were no secret at all!) and explained that the key to this bread's success was in all the method. Not much labor, just patience and an important, but simple element imperative to the baking process.

We experienced true delight as we sat at her table that afternoon, mixing, baking, and enjoying the familiar aroma of fresh bread while we listened to Severine share sweet memories of her French heritage. Each time I open my oven door to a loaf of hot, crusty, artisan bread, I'm overcome with blissful thoughts of our day in the Kitchen with Severine.

*Don't let the lengthy recipe detour you from making this bread. It's so simple and so
delicious. Email us if you have ANY questions!

Artisan Bread in Five Minutes a Day


Makes four 1-pound loaves. Recipe is easily doubled, or halved.

3 cups lukewarm water

1 1/2 Tablespoons granulated yeast

1 1/2 Tablespoons kosher or other coarse salt

6 1/2 cups unsifted, unbleached, all-purpose white flour

cornmeal

Storing and Mixing the Dough

1. Warm the water slightly. It should feel just a little warmer than body temp.

2. Add the yeast and salt to the water in a 5 quart bowl, or preferably, in a resealable, lidded (not airtight) plastic food container. Don't worry about getting it all to dissolve.

3. Mix in the flour, kneading is unnecessary. Add all of the flour at once, measuring it by gently scooping up the flour, then sweeping the top level with a knife or spatula; don't press down into the flour as you scoop or you'll throw off the measurement. Mix with a wooden spoon until the mixture is uniform. Don't knead! It isn't necessary. You're finished when everything is uniformly moist, without dry patches. This step is done in a matter of minutes, and will yield a dough that is wet and loose enough to conform to the shape of its container.

4. Allow to rise: Cover with a lid. (not airtight) Do not use screw-topped bottles or Mason jars, which could explode. Allow the mixture to rise at room temperature until it begins to collapse (or at least flattens on the top), approximately 2 hours, depending on the rooms temperature and the initial water temperature. Longer rising times, up to about 5 hours, will not harm the result. You can use a portion of the dough any time after this period. Fully refrigerated wet dough is less sticky and is easier to work with than dough at room temperature. So, the first time you try this method, it's best to refrigerate the dough overnight (or at least 3 hours), before shaping a loaf.

On Baking Day

5. The gluten cloak: don't knead, just cloak and shape a loaf in 30 to 60 seconds. First prepare a pizza peel (or cookie sheet) by sprinkling it liberally with cornmeal to prevent your loaf from sticking to it when you slide it into the oven.

Sprinkle the surface of your refrigerated dough with flour. Pull up and cut off a 1-pound (grapefruit size) piece of dough, using a serrated knife. Hold the mass of dough in your hands and add a little more flour as needed so it won't stick to your hands. Gently stretch the surface of the dough around to the bottom on all four sides, rotating the ball a quarter turn as you go. Most of the dusting flour will fall off; it's not intended to be incorporated into the dough. The bottom of the loaf may appear to be a collection of bunched ends, but it will flatten out and adhere during resting and baking. The correctly shaped final product will be smooth and cohesive. The entire process should take no more than 30 to 60 seconds.

6. Rest the loaf and let it rise on a pizza peel: (or cookie sheet) Place the shaped ball on the cornmeal covered sheet. Allow the loaf to rest there for about 40 minutes. (it doesn't need to be covered during the rest period). Depending on the age of the dough, you may not see much rise during this period; more rising will occur during baking.

7. Twenty minutes before baking, preheat the oven to 450, with a baking stone placed on the middle rack. Place an empty broiler tray for holding water on any other shelf that won't interfere with the rising bread.

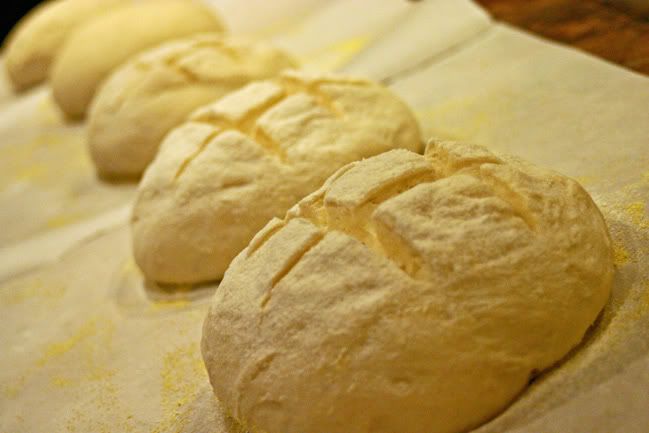
8. Dust and slash: Dust the top of the loaf liberally with flour, which will allow the slashing knife to pass without sticking. Slash a 1/4-inch deep cross or tic-tac-toe pattern into the top, using a serrated bread knife.


9. Baking with steam: After a 20-minute preheat, you're ready to bake, even though your oven thermometer won't yet be up to full temperature. With a quick forward jerking motion of the wrist, slide the loaf off the pizza peel (cookie sheet) and onto the preheated stone. Quickly but carefully pour about 1 cup of hot tap water into the broiler tray and close the oven door to trap the steam (DON'T FORGET THIS STEP!) Bake for about 30 minutes, or until the crust is nicely browned and firm to the touch. Allow to cool completely.

10. Store the remaining dough in the refrigerator in your lidded (not airtight) container and use it over the next 14 days

PS. Severine included an unexpected little surprise that day, Tart Tatin! It is a baked, French apple dessert, the best pastry these teeth have ever sunk into. Trust me, I consider myself a tasting professional, and this dessert is sacred enough to warrant it's own post, so stay tuned!


Thank you Severine! Love, Jilly
Related Posts Plugin for WordPress, Blogger...